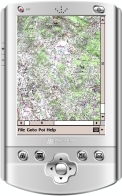
Using MAPLORER
When first started, two security warnings will be displayed: one for maplorer.exe, one for the language DLL (allowing to use the language of your device). Just click "Yes" each time.
MAPLORER will compose a map containing all tiles (all JPG
files). If it finds a GPS signal, it will automatically zoom into the right
tile and display your position. If you do not have a GPS signal (or if you do
not have a GPS…), you can zoom in by tapping/clicking on a tile.
You can move around on the current map by dragging it, or use the scroll bars. The map will only move if “Follow” is unchecked in the “File” menu.
File / Gps settings
Allows to define the parameters of your GPS; it is important to set the correct values here for the GPS to work. If you’re not sure, check your GPS manual or Google for its brand+model. This data can also be defined in the Gps.ini file (an example is included in the distribution). A typical content is:
Port=1
BaudRate=9600
ByteSize=8
StopBits=0
Parity=0
Fake=0
File / Gps raw data
Displays the data as received from the GPS. If you do not see any numbers, check File / GPS settings.
File / Save track
Saves the current track to \maplorer.gpx
.gpx files can be imported in tools like Google Earth.
File / Load track
Allows to load a .gpx file and displays the track it contains.
On certain devices, the file selection dialog can not be displayed due to a bug in the .NET framework. In this case, the user is not prompted for a file, and the track is always loaded from \maplorer.gpx
File / Follow
Check this option to keep the map centred on your current position. If unchecked, you can move the map around with the scrollbars or by dragging it.
File / Quit
Closes the application.
Goto / Index
Displays the index containing all maps (tiles). Note that if the File/Follow option is checked, the display will immediately zoom back into the tile containing your current position. (Uncheck File/Follow before using Goto/Index to avoid this).
Goto / Map
Allows to display a map by navigating to its cell in the table (A1 = top left corner, etc.). Note that if the File/Follow option is checked, the display will immediately zoom back into the tile containing your current position. (Uncheck File/Follow before using Goto/Index to avoid this).
Goto / Poi
Displays the map around a Poi. Note that if the File/Follow option is checked, the display will immediately zoom back into the tile containing your current position. (Uncheck File/Follow before using Goto/Index to avoid this).
Poi
Menu to Add & Manage Points-of-Interest (Poi). To add a Poi, select Poi/Add and tab the location on the map.
Set / Curent Position
Select Set/Current Position and tab on the map to moves the current position. This allows to account for errors in the .POS file if you know your exact current position (e.g. because you are standing next to a landmark).
Track/Offset
Select Track/Offset to move the current track to a new position by an offset vector. To define the offset, tab on two different locations on the map.
Track/Start Recording
Starts to record the current track.
Track/End recording
Stops recording the current track. Tracks are saved to a file called \Track-M.YYYY-HHhmm.gpx (M = month, YYYY = year, HH = hour, MM = minutes).
Help
Displays a brief help page.
Next  Contact